Repairing the icon cache in Windows 10 can resolve issues with icons on your computer. The icon cache serves as a storage repository for icons utilized by your Windows documents and programs, facilitating quicker access by storing them rather than loading them anew each time they’re required.
When encountering problems such as outdated icons persisting despite application updates or distorted icons, it signifies corruption within the Windows icon cache, necessitating repair or rebuilding.
Understanding the Functionality of the Icon Cache
Understanding the Icon Cache’s Functionality in Windows 10 is crucial before delving into repair methods. Icons pervade the Windows interface, and constantly retrieving icon images from the hard disk can strain system resources. Enter the Icon Cache: Windows stores readily accessible copies of all icons within it.
When Windows requires an icon, it simply retrieves it from the Icon Cache instead of fetching it anew from the application. Additionally, upon computer shutdown or restart, the Icon Cache writes its contents to a hidden file, eliminating the need for reloading icons later. This cache data is stored in a database file named IconCache.db. In Windows Vista and Windows 7, the Icon Cache file is typically located at: [file path].
In Windows 8 and 10, while the icon cache file may still be found at the same location as in Windows Vista and 7, Windows does not utilize this location to store the icon cache. Instead, in Windows 8 and 10, the icon cache file is typically located in:
Within this folder, you’ll encounter several icon cache files, including:
- iconcache_16.db
- iconcache_32.db
- iconcache_48.db
- iconcache_96.db
- iconcache_256.db
- iconcache_768.db
- iconcache_1280.db
- iconcache_1920.db
- iconcache_2560.db
- iconcache_custom_stream.db
- iconcache_exif.db
- iconcache_idx.db
- iconcache_sr.db
- iconcache_wide.db
- iconcache_wide_alternate.db
Repairing the icon cache involves deleting all the icon cache files. However, it’s not as straightforward as simply pressing “delete” because these files are actively used by Explorer. Yet, there’s always a solution.
To repair the Icon Cache in Windows 10:
- Launch File Explorer and navigate to the following directory:
C:\Users\<your username>\AppData\Local\Microsoft\Windows\Explorer
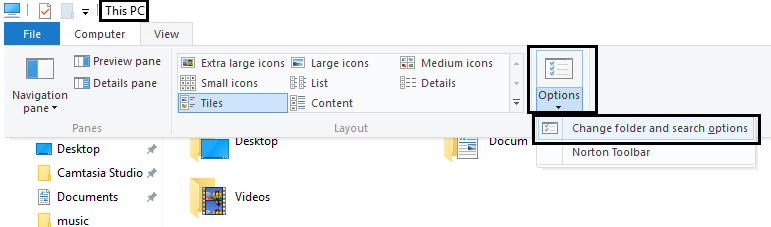
2. In the Folder Options menu, choose “Show hidden files, folders, and drives,” and deselect “Hide protected operating system files.”
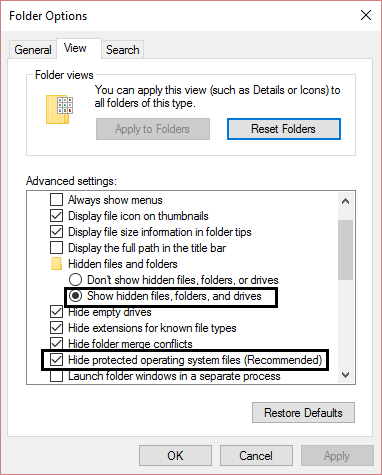
3.Once completed, you will be able to view the AppData folder.
4. Next, press and hold the “Shift” key, then right-click on the Explorer folder. From the context menu, select “Open command window here.”

5. This action will open a command prompt window at the specified path.

6. To confirm you’re in the correct folder, type the “dir” command into the command prompt. You should then see the iconcache and thumbcache files listed.
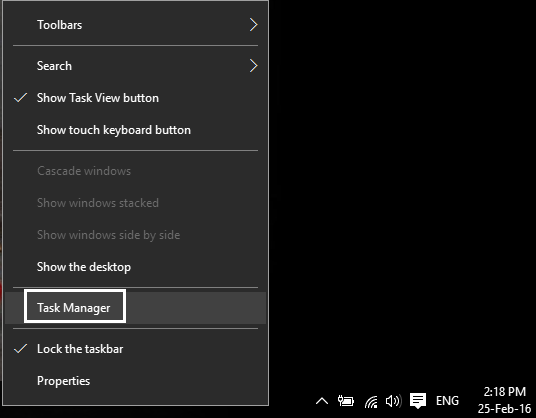
7. Right-click on the Windows taskbar, then select “Task Manager.”
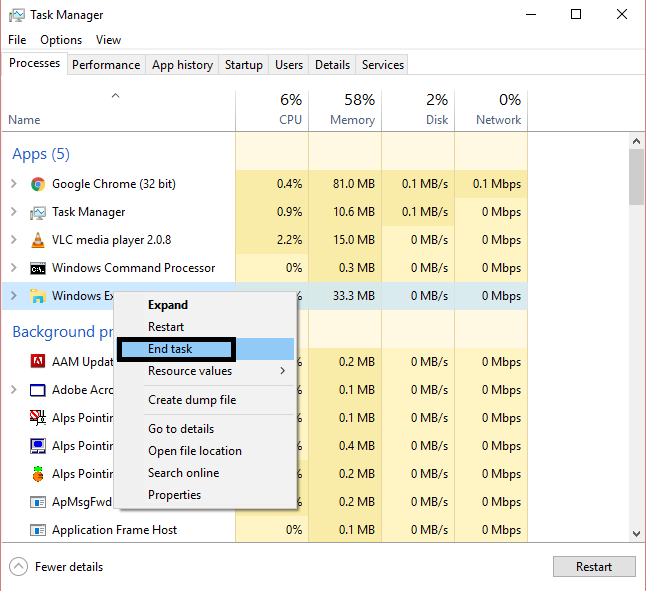
8. Right-click on “Windows Explorer” within the Task Manager window and select “End task.” This action will cause the desktop and Explorer to disappear. Afterward, exit Task Manager, ensuring that no other applications are running alongside it.
9. In the command prompt window, type the following command and press Enter to delete all the icon cache files:
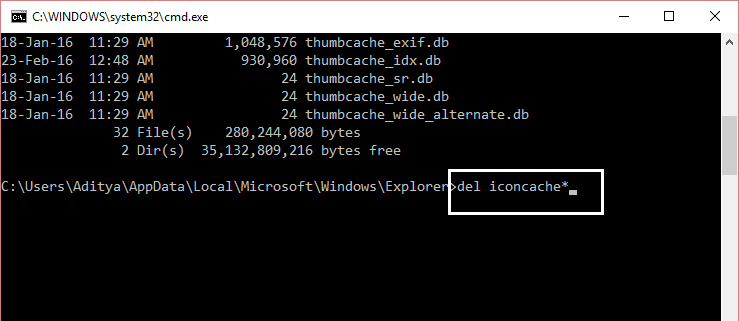
10. Once more, execute the “dir” command to inspect the remaining files list. If any icon cache files persist, it indicates that some applications are still running. Close these applications via the Taskbar and repeat the procedure.
Sign off from your computer by pressing Ctrl+Alt+Del and selecting “Sign out.” After signing back in, any corrupted or missing icons should ideally be repaired.

Mastering Icon Cache Rebuilding in Windows
Knowing how to eliminate corrupt icon cache files in Windows is invaluable. When Windows encounters difficulties displaying icons accurately or when they disappear altogether, having this knowledge empowers you to take corrective action.
Additionally, if you’re seeking to revamp the appearance of your operating system, experimenting with custom icon packs can breathe new life into your Windows computer.
Frequently Asked Question
Why do I need to repair the icon cache?
Repairing the icon cache can resolve issues such as missing or corrupted icons in Windows 10, ensuring a smoother user experience.
Is repairing the icon cache safe?
Yes, repairing the icon cache is a safe procedure and can be done without causing harm to your system. However, it’s essential to follow the instructions carefully.
Will repairing the icon cache affect my data or settings?
No, repairing the icon cache should not affect your data or settings. It primarily deals with the visual representation of icons in Windows.
Do I need administrative privileges to repair the icon cache?
Yes, you may need administrative privileges to access certain system folders and perform actions like deleting icon cache files.
What if repairing the icon cache doesn’t fix my icon issues?
If repairing the icon cache doesn’t resolve the problem, you may need to troubleshoot further or seek assistance from Microsoft support or online forums.
Can I automate the process of repairing the icon cache?
While there are third-party tools available that claim to automate this process, it’s recommended to follow manual steps provided by trusted sources to ensure system integrity.
How often should I repair the icon cache?
It’s not necessary to repair the icon cache regularly. You may only need to do it if you encounter issues with icons in Windows 10.
Conclusion
Mastering the process of repairing or rebuilding the icon cache in Windows is a valuable skill. It enables you to troubleshoot and resolve issues related to missing or corrupted icons efficiently, ensuring a smoother user experience. Additionally, exploring custom icon packs can provide a refreshing update to the look and feel of your Windows computer, allowing for personalization and customization. By understanding these aspects, you can enhance both the functionality and aesthetics of your operating system.