Creating a system restore point is crucial for maintaining your computer’s stability. System Restore allows you to revert your computer’s state—including system files, installed applications, Windows registry, and settings—to a previous point in time when everything was working correctly. This feature helps recover your system from various issues and malfunctions.
When an installed program or driver causes unexpected errors or makes Windows behave unpredictably, uninstalling the program or driver usually resolves the problem. However, if this doesn’t work, restoring your system to an earlier date can be an effective solution.
System Restore relies on a feature called system protection, which regularly creates and saves restore points on your computer. These points include vital information about registry settings and other system data that Windows utilizes. This Windows 10 guide will teach you how to create a system restore point and how to use it to restore your computer if you face any problems.
Creating a System Restore Point in Windows 10
Before creating a system restore point in Windows 10, you must enable System Restore, as it is not enabled by default.
Enabling System Restore in Windows 10
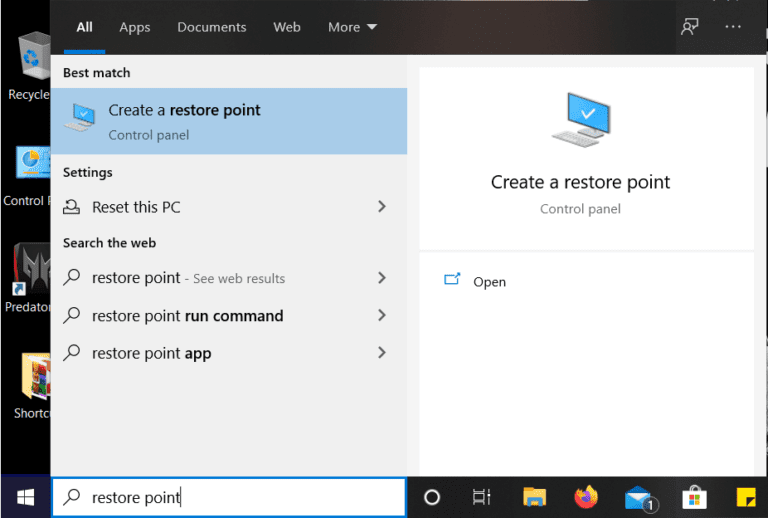
- Type “Create a restore point” in the Windows search bar and click on the top result to open the System Properties window.
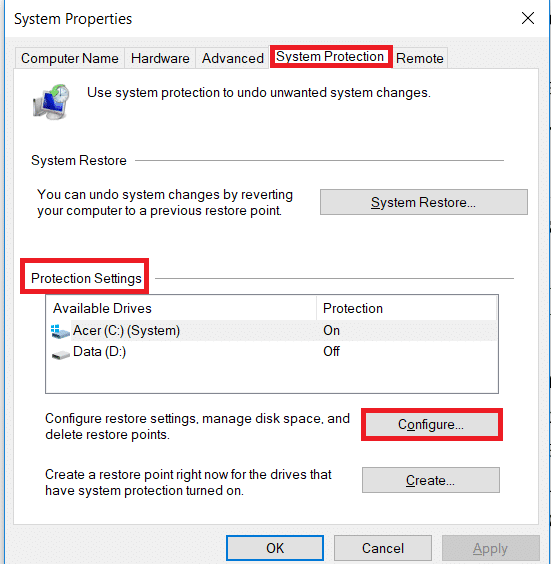
2. In the System Protection tab, select the C: drive (where Windows is typically installed) and click on the Configure button.
3. Check “Turn on system protection” under Restore Settings, adjust the Max Usage under Disk Space Usage, then click OK.
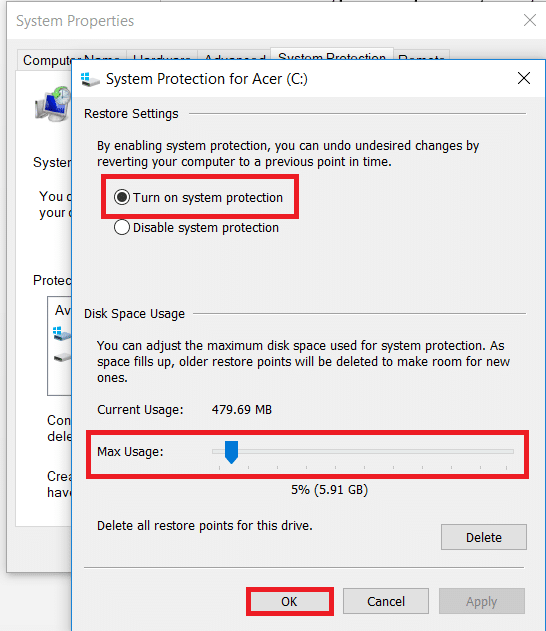
4. Click Apply, then OK, to save the changes.
Creating a System Restore Point in Windows 10
- Type “restore point” in the Windows Search bar, then click “Create a restore point” from the search results.

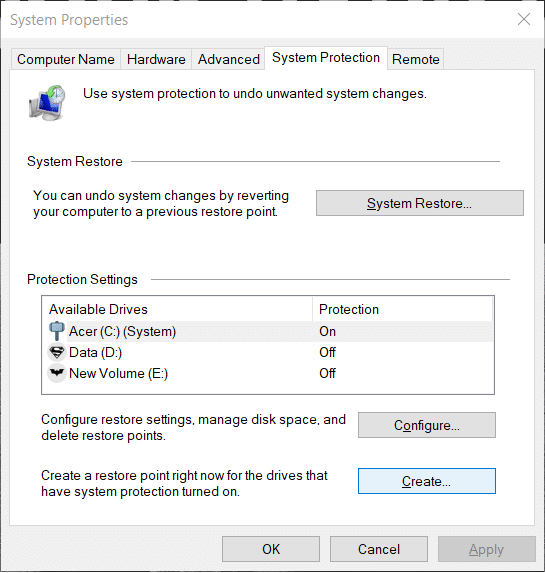
2. In the System Protection tab, click on the Create button.
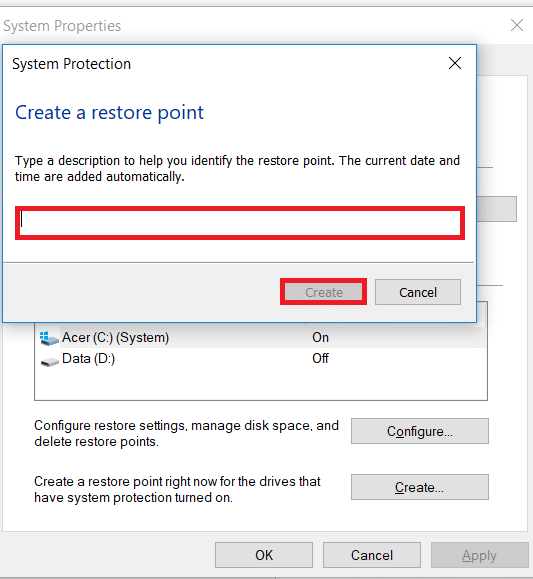
3. Enter a descriptive name for the restore point, then click Create.
Note: It’s essential to use a clear and descriptive name to quickly identify the purpose of the restore point, especially if you have multiple restore points.
4. Wait a few moments for the restore point to be created.
5. Once done, click the Close button.
In the future, if your system encounters issues or errors you can’t resolve, you can restore it to this restore point, reverting all changes made up to that point.
Performing a System Restore
To utilize System Restore on Windows 10, follow these steps:
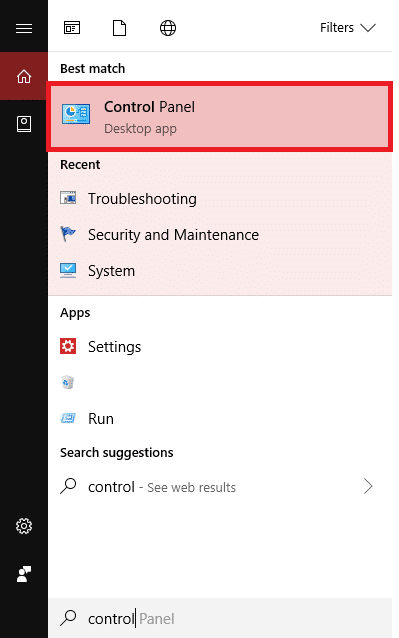
- In the Start Menu search, type “Control Panel.” Click on the Control Panel in the search results to open it.
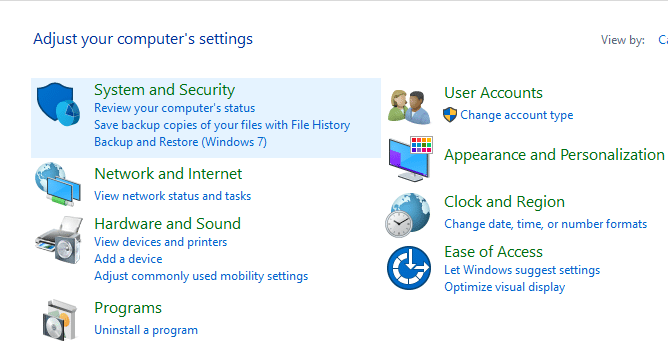
2. click the “System and Security” option in the Control Panel.
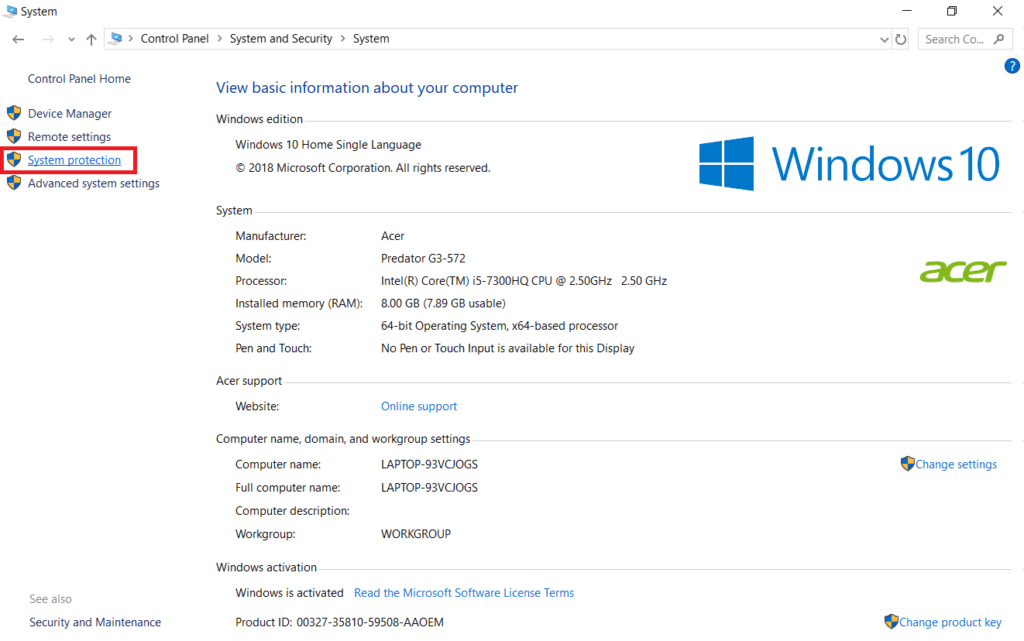
3. Then, click on the “System” option.
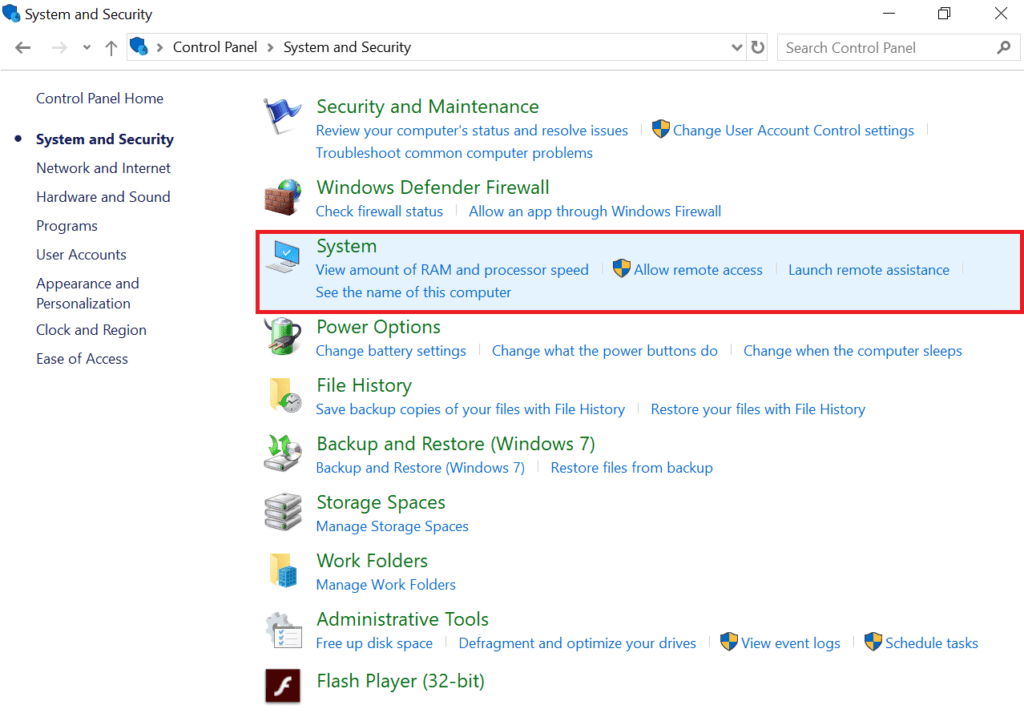
4. From the top left-hand side menu of the System window, click on “System Protection.”
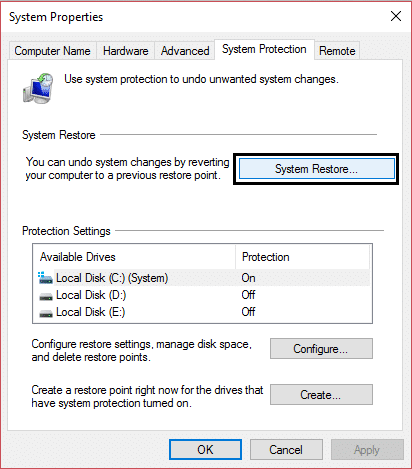
5. In the System Properties window, click the “System Restore” button under the Protection Settings tab.
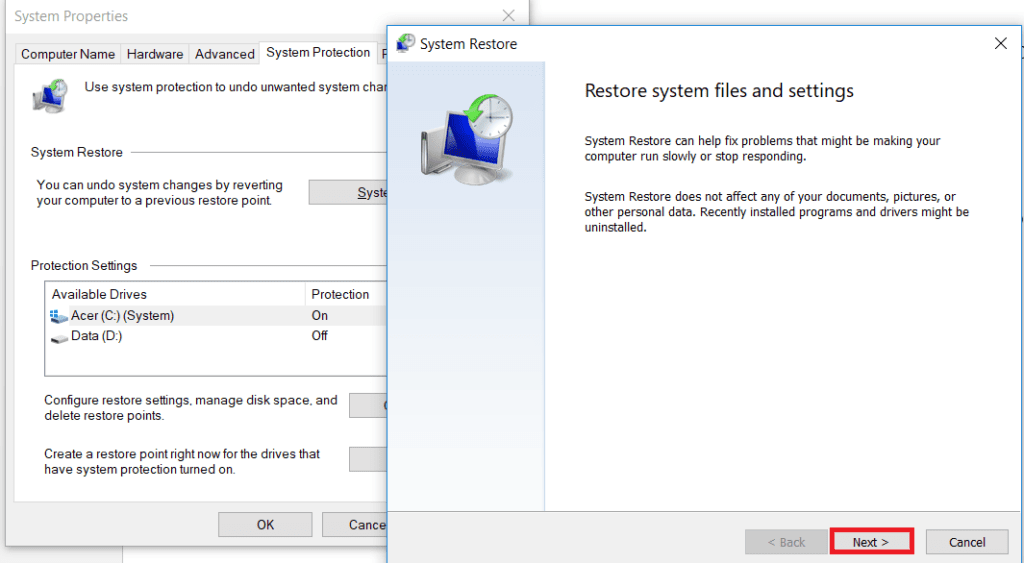
5. A System Restore window will appear. Click “Next.”
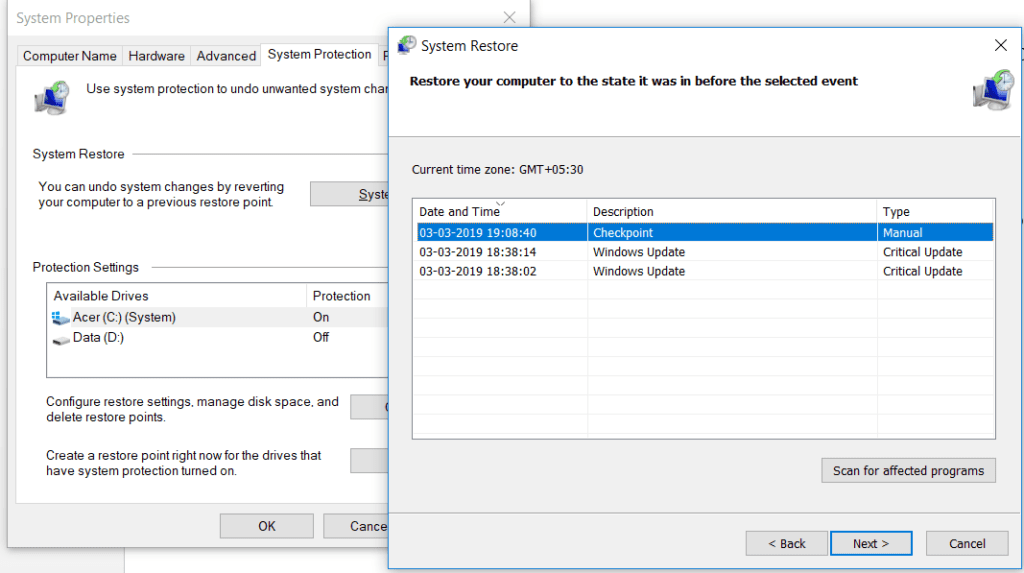
7. A list of System Restore points will appear. Choose the System Restore point you want for your PC, then click “Next.”
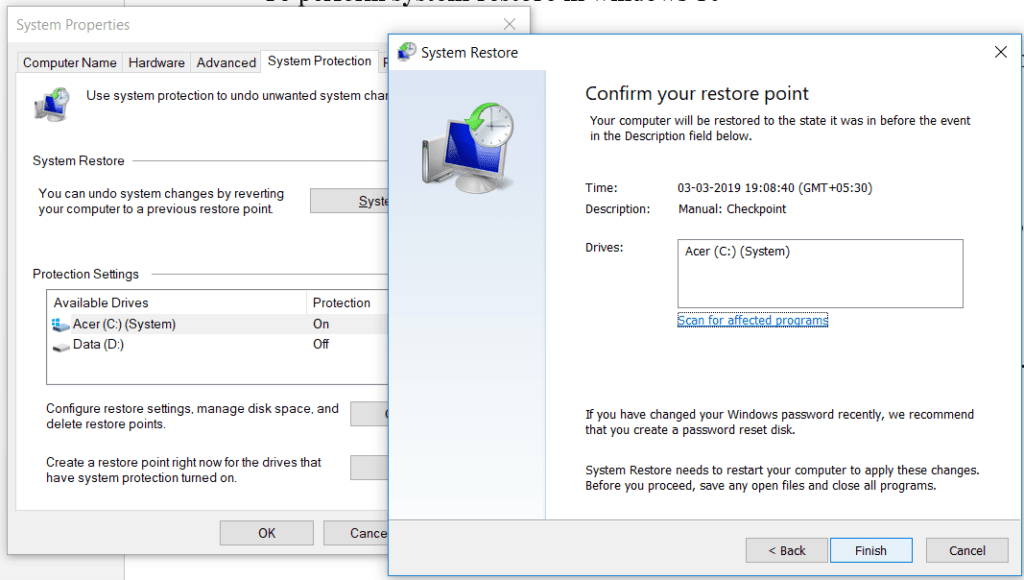
8. A confirmation dialogue box will appear. Finally, click on “Finish.”
9. Click “Yes” when a message prompts: “Once started, System Restore cannot be interrupted.”
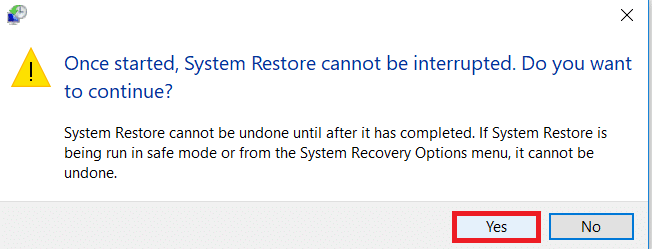
Once initiated, the System Restore process will proceed to completion. It’s important to note that it cannot be interrupted once the process begins. It may take some time to finish, so it’s essential not to panic or attempt to forcefully cancel it. Once the restoration is complete, your computer will be reverted to an earlier state where everything functions as expected.
Frequently Asked Question
Why should I create a System Restore Point?
Creating a System Restore Point allows you to restore your computer’s configuration to a previous state if something goes wrong after you make changes.
How do I access the System Restore feature in Windows 10?
You can access the System Restore feature by searching for “Create a restore point” in the Windows search bar and clicking on the corresponding result.
Can I create multiple System Restore Points?
Yes, you can create multiple System Restore Points to capture different system configurations at various times.
How much disk space does a System Restore Point occupy?
The disk space occupied by a System Restore Point depends on the size of your system and the amount of data that needs to be stored. You can adjust the maximum disk space allocated for System Restore in the System Protection settings.
Will creating a System Restore Point affect my files?
A: No, creating a System Restore Point only captures system files and settings. It does not affect your files or documents.
How often should I create a System Restore Point?
It’s a good practice to create a System Restore Point before making significant changes to your system, such as installing new software or drivers or changing system configuration.
Can I delete old System Restore Points?
You can delete old System Restore Points to free up disk space. Access the System Protection settings and select the option to delete or restore points. However, remember that deleting old restore points will prevent you from reverting your system to those specific points in time.
Conclusion
Creating a System Restore Point in Windows 10 is a simple yet powerful way to safeguard your system against unforeseen issues. Following the steps outlined above, you can easily create restore points and revert your system to a previous state if needed. Remember to create restore points before making significant changes to your system to ensure you can quickly recover in case of any problems.